AD. A kitchen island can handle food preparation, storage, dining and everyday family life when every centimetre has a clear purpose. The most successful designs respond to how you actually use the room, from unpacking the weekly shop to helping with homework. Before settling on colours or finishes, think through those daily routines and identify where each activity should happen. This practical groundwork will give you an island that looks polished without sacrificing comfort or function.
Map Out Multi-Functional Zones
Divide the island into zones based on specific tasks. One end might hold chopping boards, mixing bowls and preparation utensils, while the other provides clear space for breakfast or laptop work. The concept of a multi-functional kitchen island works best when these activities don’t compete for the same surface.
Mark the proposed footprint on the floor with masking tape before ordering cabinetry. Walk around it, open nearby doors and carry a dinner plate from the island to the dining area. Aim for roughly one metre of clearance where space allows, with extra room beside appliances that open into the walkway. This simple test often reveals where an island needs shortening or repositioning.
Select Hard-Wearing Countertop Materials
The work surface faces hot pans, food spills, heavy shopping bags and constant wiping, so durability deserves as much attention as colour. A made-to-measure Quartz worktop offers a sophisticated finish and a non-porous surface that is straightforward to clean. It can also be fabricated around sinks and other fitted elements for a tidy result.
Ask for samples and view them in your kitchen at different times of day. Fine patterns tend to disguise crumbs and light marks, while very dark polished colours may show fingerprints more readily. You should also confirm the care instructions before choosing. Use trivets for hot cookware and chopping boards for food preparation, even when the material is designed for demanding kitchen use.
Incorporate Integrated Seating
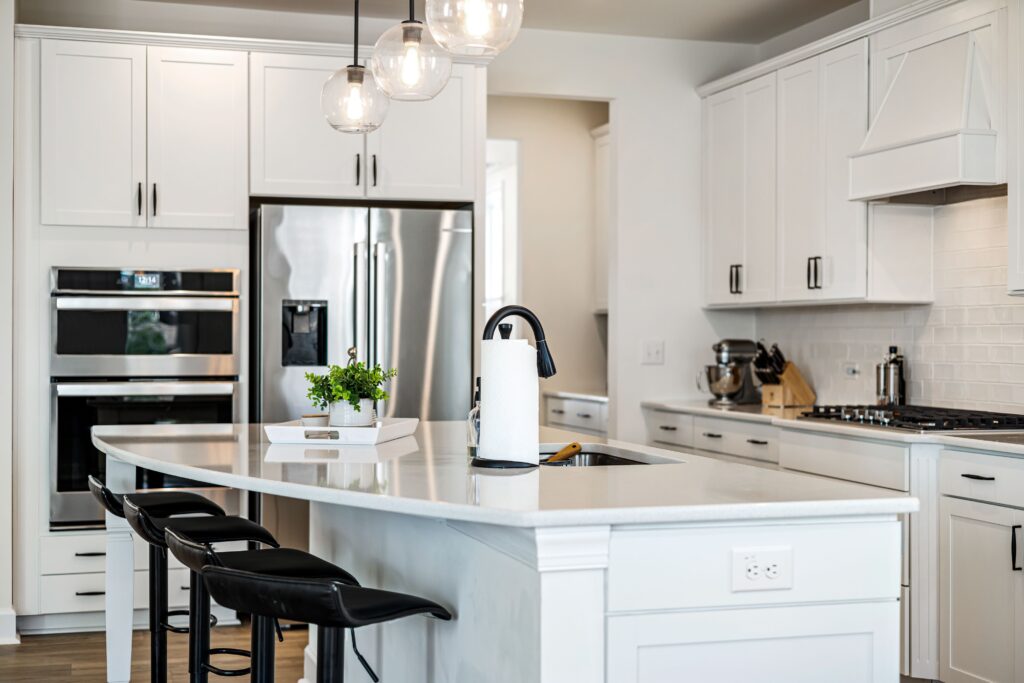
Allow enough room for people to sit comfortably without blocking preparation areas. Each seat generally needs around 60 centimetres of width, while a worktop overhang of approximately 25 to 30 centimetres gives adults useful knee space. Backless stools slide neatly underneath, although chairs with supportive backs may suit long breakfasts and homework sessions better.
Thoughtful kitchen island design also accounts for how people move around seated guests. Position stools away from the busiest route between the sink, fridge and cooking area. If space is tight, seating along one side usually creates fewer pinch points than wrapping stools around a corner. Choose wipe-clean upholstery or solid seats for easier maintenance in a busy household.
Plan Task Lighting That Works Hard
Lighting should cover the whole worktop without casting strong shadows over preparation areas. A row of pendants can provide focused light and visual interest, but spacing matters. For three pendants, centre the middle fitting first and place the others at equal distances, keeping the arrangement comfortably inside the island’s edges.
Select fittings that suit the island’s scale. Large shades can overwhelm a compact surface, while tiny pendants may leave a long island looking unfinished. Dimmable controls let you move from bright preparation light to a softer setting during dinner. If the island includes a sink or other practical work zone, check that every part receives clear, even illumination. Plan electrical points early too, including sockets for small appliances and charging devices.
Once the layout is drawn, test it against one ordinary day in your home. Follow the route from unloading groceries to preparing dinner and clearing plates. Any awkward reach, blocked cupboard or poorly lit corner is far easier to correct on paper than after the island has been installed.