Planning Your DIY Furniture Makeover
AD. Starting a DIY furniture makeover requires some thought. You will need to decide on the right furniture piece and a color that matches your space. Gather your supplies to make your project successful and enjoyable.
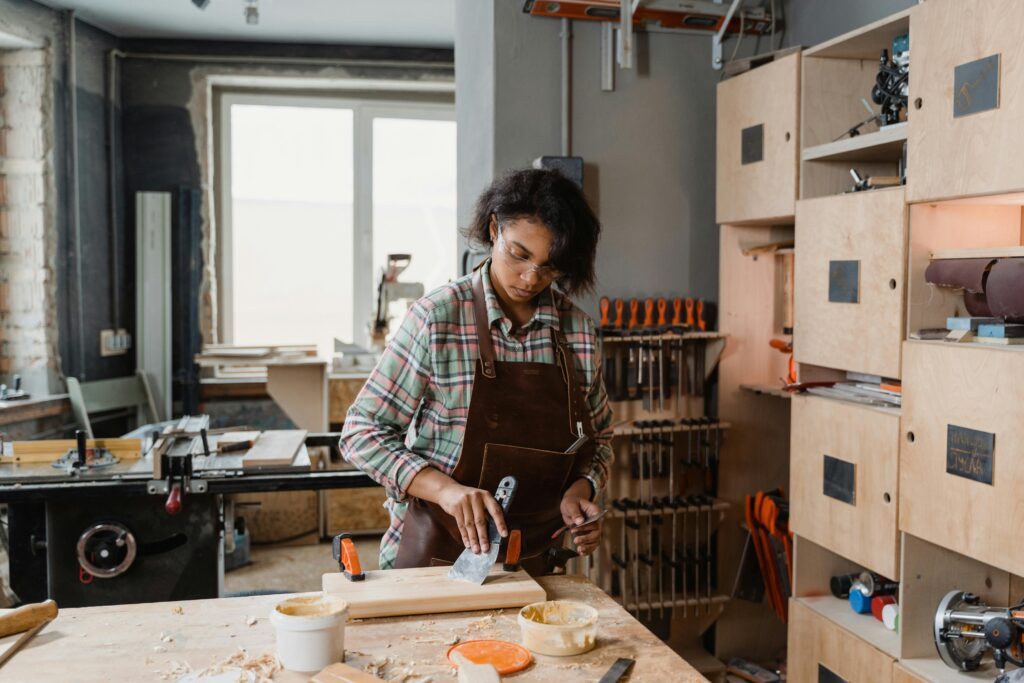
[Photos by Tima Miroshnichenko]
Choosing the Right Piece
Begin by selecting a piece that will fit well in your space. Look for old or vintage furniture that has good bones but maybe looks a bit tired. Think about the size and shape of the piece and how it will work with your other furniture.
Consider what you need. If you’re missing storage, an old dresser might be perfect. If you love unique pieces, look for something with interesting legs or carvings. Garage sales, thrift stores, and online marketplaces are great places to find your next project.
Selecting a Color Scheme
Your color scheme sets the tone for your makeover. Choose colors that fit your existing décor. Neutral tones are safe and timeless. Bold colors like teal or mustard can make a statement if you are feeling adventurous.
Look around your room for inspiration. Repeat a color already present, or choose a hue that complements it. You can also use color swatches to help visualize how the final piece will look. Don’t forget to factor in the finish, whether matte, satin, or glossy.
Gathering Supplies
With your piece and color in mind, make a list of supplies. Basic tools include sandpaper, brushes, rollers, and screwdrivers. Paint or stain should match your color scheme choices.
You might need more than just paint. If your furniture has scratches, consider wood filler. A primer can help the paint stick, especially if the furniture has an old finish. Don't forget to wear safety gear like gloves and masks if dealing with chemicals. Having all your supplies ready makes the project smoother and more enjoyable.
Preparation and Cleaning
Getting your furniture ready for a makeover involves a few key steps. You need to inspect and repair any damage, strip away old finishes, and ensure the piece is clean and sanded for new paint or stain.
Inspecting and Repairing
Before transforming your old furniture, check for damages. Look for loose parts, sticky drawers, or wobbly legs. Fixing these issues early prevents bigger problems down the line.
Small repairs can be done with wood glue or clamps. For broken pieces, consider replacing them. It's also a great time to change knobs or handles for a fresh look. Make sure everything is stable and secure before moving on to the next step in your furniture makeover.
Stripping Old Finish
Removing old finishes is essential for a smooth, professional look. Start by choosing the right stripper for your furniture. Some are strong and fast-acting, while others are gentler.
Wear protective gear like gloves and goggles when handling these chemicals. Apply the stripper evenly, then scrape off the loosened finish with a putty knife.
For detailed areas, use steel wool or a soft brush. Once the old finish is gone, rinse the surface to remove any residue. This prep step ensures the new finish adheres properly.
Cleaning and Sanding
Cleanliness is vital before applying new paint or stain. Use a gentle cleaner to remove dirt and oils. Simple Green is a good choice because it cleans without leaving a harsh residue.
After cleaning, let the furniture dry completely. Next, sand the surfaces with different grit sandpapers, starting from a coarse 120 and moving to a finer 220. This helps create an even and smooth surface.
Finally, wipe away all dust with a tack cloth or a damp rag. Cleaning and sanding give you a solid foundation for the rest of your makeover, ensuring that new finishes last longer and look their best.
Painting and Finishing Techniques
When transforming furniture, using the right paint and finish can make a huge difference. Whether you choose milk paint or decide to add stencil designs, there's a technique for everyone. Don't forget to apply a protective coat to keep your masterpiece looking fresh and vibrant.
Using Milk Paint and Chalk Paint
If you're looking to give your furniture a vintage or rustic feel, consider using milk paint or chalk paint. Milk paint comes in powder form and needs to be mixed with water. It's great for creating an old-fashioned look and works well on raw or unfinished wood.
Chalk paint furniture is another popular choice. You don't need to spend much time preparing the surface, and it's easy to distress the finish for that rustic charm. Both paints adhere well, and you can layer colors to create depth and interest.
Mastering the Art of Stenciling
Stencils are wonderful for adding patterns and personal touches to your furniture pieces. You can buy stencils at most craft stores or make your own using stencil sheets and a craft knife. Secure the stencil to your furniture using painter's tape so it doesn't move around.
When applying paint, use a small stencil brush or roller and dab the paint gently to avoid bleeding. Doing this slowly and carefully will help keep the edges sharp. Wait for the paint to dry before removing the stencil to ensure a clean result. This process allows you to customize your pieces and inject some personality.
Applying Protective Top Coats
Finishing your painted furniture with a protective top coat is essential for durability. There are various types like wax, polyurethane, or polycrylic suitable for different needs. Wax top coats provide a soft finish and work best with chalk paint. Polyurethane gives a hard, durable surface that's good for high-use furniture like tables.
Polycrylic is water-based and doesn’t yellow over time, making it ideal for lighter colors. Applying thin layers with a clean brush or cloth, and allowing them to dry completely between coats, will yield the best results. Protecting your work ensures it remains beautiful and withstands everyday wear.

Embellishments and Decorative Features
Bring your furniture makeover to the next level with creative embellishments and decorative features. Enhance surfaces with techniques like decoupage, customized drawer fronts, and a stylish herringbone pattern to make each piece uniquely yours.
Adding Decoupage Elements
Decoupage is a fun way to dress up furniture using paper or fabric cutouts. You can use scraps like old maps, vintage posters, or floral prints.
Once you pick your design, you apply it with a special glue called Mod Podge. Start by cleaning and sanding the furniture surface.
Next, carefully place the cutouts where you want them and cover them with a thin layer of Mod Podge to seal. This layering process creates a smooth finish while protecting the paper from wear and tear.
Decoupage opens a world of creative possibilities, allowing you to personalize furniture in countless ways.
Customizing Drawer Fronts and Hardware
Drawer fronts are a great canvas for adding flair to your furniture piece. You can paint them in vibrant colors or use stencils to add patterns.
Changing the hardware like knobs and handles can also make a big impact. Try using antique brass knobs for a vintage feel or sleek metal handles for a modern look.
For a playful touch, mix and match different styles of knobs across drawer fronts. Even adding creative touches like colorful washi tape can bring new life to plain drawers.
Choosing the right combination of paint and hardware helps in transforming ordinary furniture into a remarkable focal point.
Creating a Herringbone Pattern
Creating a herringbone pattern can add sophistication to your furniture pieces. This technique involves arranging pieces of wood or strips of laminate in a zigzag pattern.
Start by marking the center of the area, then lay each piece at an angle, forming a V shape. You can paint each section a different color for a bold statement or keep it in natural tones for a subtle effect.
Using painter's tape can help keep lines crisp and neat. Patience is key, as precise placement is crucial for achieving the desired look.
The finished pattern is striking and adds depth, making your furniture a true standout.
Upholstery and Fabric Updates
Refresh your furniture with a new look by updating the upholstery. Start with selecting the right materials and then follow simple steps to complete your project. This guide will help you choose fabrics and walk you through reupholstering your furniture step by step.
Choosing Fabric and Materials
When selecting fabric for your furniture, durability and style are key factors. Choose materials that can withstand regular use, like canvas or denim for heavily used pieces. For a softer touch, opt for velvet or linen.
Color and pattern are crucial for matching your existing decor. Bold prints add personality, while neutral tones ensure versatility. Don't overlook the importance of checking fabric swatches at home, as lighting affects color perception. Consider the fabric texture, too, as it can complement or contrast with other materials in your space.
Step-by-Step Upholstery
Begin with removing old fabric and staples. Carefully take apart the existing upholstery without damaging the furniture frame. This is crucial for using the old pieces as templates for cutting new fabric.
Cut the new fabric slightly larger than the old pieces to allow for wrapping and adjustments. Attach the fabric to frame using a staple gun, starting from the center and working outwards to avoid wrinkles. Pay special attention to corners, folding neatly for a tailored look.
Finish by securing edges and trimming excess fabric. For an added touch, consider adding decorative trim or nailhead details. Reupholstering is a rewarding DIY project that revitalizes your furniture with personal style.
Unique Project Ideas and Inspiration
Breathing new life into old furniture can bring character to your home. With a few simple tools and some creativity, you can transform items like coffee tables, antique dressers, and even build your own custom vanity. These projects will give your space a fresh, personalized feel.
Transforming a Coffee Table
A basic coffee table can be turned into a stunning piece with a few clever ideas. Start by sanding down any rough spots for a smooth surface. Then, think about adding a faux marble finish or using contact paper for an easy update. Paint can also add a bold new look. Choose contrasting colors for legs and top to make it stand out.
If you're feeling adventurous, consider adding a storage shelf underneath to keep clutter hidden. This not only changes the look but also makes the table more functional. Finish it off with new hardware, like handles or knobs, for a completely fresh feel. These small changes can dramatically alter the table’s appearance.
Refurbishing an Antique Dresser
An antique dresser has charm that just needs highlighting. Start with a good cleaning to remove any old grime. Once clean, you can strip off any old finish and repaint or stain it. Chalk paint is popular for refurbishing antiques, giving them a modern yet classic look.
Adding new drawer pulls is a simple way to refresh the dresser. Don't shy away from mixing metals or colors to create an eclectic vibe. You might also want to line the drawers with decorative paper for a surprise pop of color each time you open them. The dresser will feel completely renewed yet still keep its vintage essence.
Building a Custom Vanity
When you build a custom vanity, your options are endless. Choose materials that suit your style, like reclaimed wood for a rustic feel or sleek laminate for modern looks. The key is to make it match your space and needs. Incorporating storage solutions like built-in shelves or drawers will enhance its functionality.
Think about adding a unique countertop, maybe a contrasting color from the base. A statement mirror can also transform this piece into a focal point in your room. Don't forget about the little details—interesting handles, a splash of paint, or even integrated lighting can make your vanity not just practical but also a beautiful feature in your bathroom.


I wish I could be better at DIY, I'm absolutely hopeless! But these are great tips on how to refurbish old furniture and customisation of furniture x
Lucy | http://www.lucymary.co.uk